Wednesday, December 30, 2009

Even when the sky is falling down


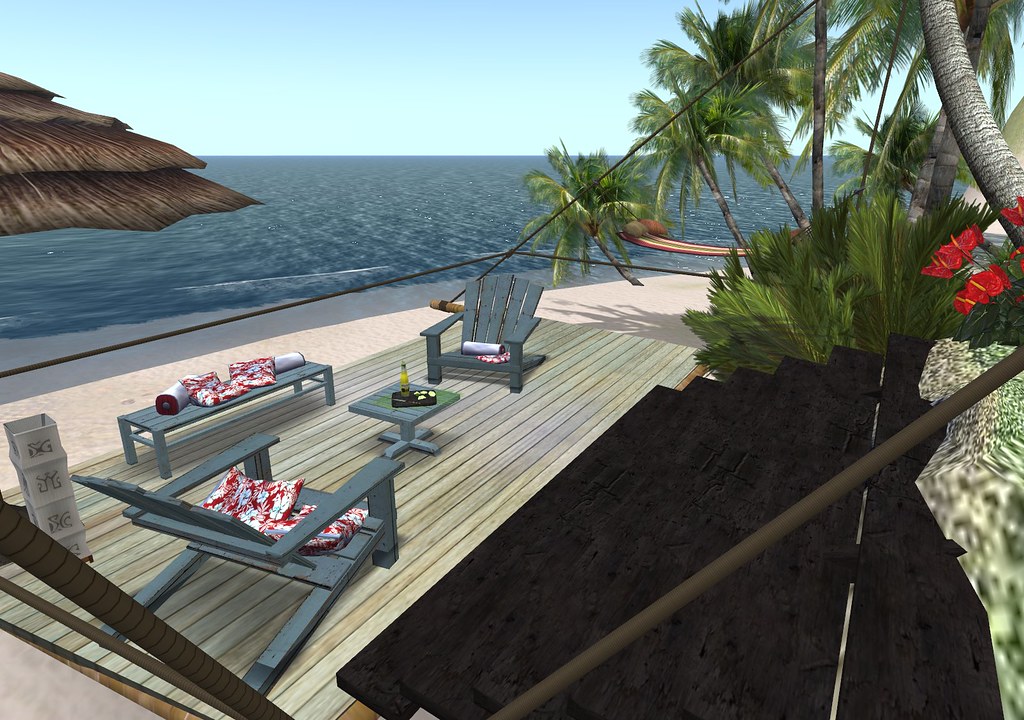
Title of picture - "Even when the sky is falling down" 

Photographer's Name - Tess Falworth (tessfalworth@gmail.com)

Models Name - Tess Falworth

Location used - Taken at Rez

Windlight settings used - Coastal Sunset

Second Life Graphics Settings - High

Inworld photo tools used - Just a facelight

Details of inworld tools - NA

outworld tools used - Photoshop CS3

Processes used in outworld tools -

1) did my usual cropping to make the image tighter
2) took a copy and overlayed it on itself, using soft light setting in photoshop
3) desaturated the bottom layer a bit, enough to tone down the colors but still keep some
4) used the blur tool to smooth out rough edges
5) added the butterflies from  Deviant Art, from Unholy Stock, sort of my signature butterflies now, I've used them over and over..I like them becuase they are individual and their background is transparent, so I can crop them use them singly anywhere I want.
6) overlayed a texture by Max F. Williams from Flickr, using soft light setting in photoshop. This is my absolute FAVE texture. I thik 90% of my textured pics have this texture in one form or another.


Comments & Additional info


The thing about pics in SL.. it all starts with a good capture. After that what you do to enhance it just makes it all the more lovely. :)
 
Shape : my own..*smiles*
Skin: League
Eyes: Redgrave, Neverforget in Cyan
Hair: Zero Style
Tattoo: Garden of Ku
Bracers, collar, and boots: CatNip
Ears and Tail: K&L
Top: Immerschoen
Jeans: WoW
 
My own two cents: Redgrave eyes photograph amazingly well, as do their skins. But, lately, I've been partial to Curio and League. Zero Style hair is incredibly realistic in pics and has amazing flowiness :)  While I didn't  before, now when I shop for clothes, hair, skins, etc, I ask ":will this look good in a pic?" if so then I get it.. if not, then.. no. Generally speaking, the better the textures and the more detailed, the better it will look in an SL pic. Just my own opinion *grins*

Come, come dance with me..


Title of picture - "Come, come dance with me..." (title is inspired from "butterfly" by Crazy Town)

Photographer's Name - Tess Falworth

Models Name - Tess Falworth

Location used - My Studio

Windlight settings used - Ana Lu studio 5 (it's my personal favorite)

Second Life Graphics Settings - Medium

Inworld photo tools used - N30 studio with a background purchased from Xstreet

Details of inworld tools - NA

outworld tools used - Photoshop CS3

Processes used in outworld tools - 
Background is from Xstreet

brushes from Deviant art
butterflies from Unholy Stock from Deviant Art
used one texture overlayed over the picture...from pareerica in Flickr
 
1)First, took the background, copied it, overlayed it to richen the colors, used gaussian blur to about 7 or so
2)Then, took my pic and used the cropping tool and placed it in the backgroud.
2)copied and overlayed the image of me, using soft light setting in photshop, gaussian blurred the top layer, using about 7.5 or so
3)once I got the right color saturation, I added the butterflies, copying each one, overlaying them, and then used gaussian blur at about 7 or so..just played with the slider til it looked good
4) used the blurr tool to smudge the edges a bit
5) then rendered a flash on photoshop, right behind my face betweemy cheek and my arm to make a nice glow
6)then took the texture and overlayed it.. using gaussian blur to aboutt 20 to make it smooth


Comments & Additional info

Skin by Curio, June in Acorn
Hair by 69
eyes from Redgrave, Neverforget
Shape by me...original
lingerie by blacklisted, badthings
arm bracers by CatNip

After


Title of picture - After

Photographer's Name - Tess Falworth - (tessfalworth@gmail.com)

Models Name - Tess Falworth

Location used - my own studio

Windlight settings used -  Ana Lu's studio 5

Second Life Graphics Settings - medium, with a facelight

Inworld photo tools used - N30 photostudio

outworld tools used - Photoshop CS3

Processes used in outworld tools - took the image and duped it.. overlayed it. Then took a texture, the purply one, and overlayed it but made it "soft light" setting. Then, used gaussian blur setting on the topmost copy of the image itself.. about 8.0 or so. Then, smoothed out edges. Then used some brushes from Deviant art to create the "bubbles"..then used the sharpen tool to sharpen the edges. The overall effect was a watercolor with the pencil sketch outline still visible.
 

Comments & Additional info
Shape: my own
Skin: Curio..Winter in moonglow
hair: Exile.. Jenna in browns
Eyes: Redgrave..Neverforget
armbracers: CatNip

Tuesday, December 29, 2009

Liquify (before/after)


Title of picture - Liquify

Photographer's Name - Rylan Carling

Models Name - Rylan Carling

Windlight settings used - Basic default, played with lighting to get best shadow reduction

Inworld photo tools used - None

Details of inworld tools - NA

outworld tools used - Photoshop

Processes used in outworld tools - This is a basic photo, before any other processing is done.  One of the first things that I work on is using the liquify tool in PS.  Again, this is a very basic before/after shot...but, even with this, you can see the differences in specific areas that are a bit "off." (Specifically check out the wrist and the front of the dress)

Tuesday, December 22, 2009

Christmas Eve


Title of picture - Christmas Eve (Not A Creature Was Stirring)


Photographer's Name - Rai Blaylock


Location used - My Home


Windlight settings used - This was done with the Emerald Client using the advance setting in sky of [AnaLu] Outdoor night. For those that may not have this setting the sky details needed are as follows: 


Second Life Graphics Settings - High


Inworld photo tools used - None


Details of inworld tools - NA


Outworld tools used - None


Processes used in outworld tools - None


Comments & Additional info
I believe in capturing Second Life tools available. I love doing touch ups in Photoshop but really it's just fun to see a scene and capture it with what you got. I mess with advance sky settings all the time. I make several of my own just because sometimes a moment calls for it. Thanks Al for setting up this site ♥

Monday, December 21, 2009

Custom Gift Card


Title of picture - Secret Santa Gift Card


Photographer's Name - Aldwyn Zanzibar


Models Name - Aldwyn Zanzibar


Location used - NA


Windlight settings used - Analu. outdoor city midday


Second Life Graphics Settings - Ultra


Inworld photo tools used - A little Studio I built myself, to create a greenscreen behind me


Details of inworld tools - Used a pose lent to me by a friend and held the gifts, with the greenscreen behind me


outworld tools used - Paint.net
                                   cooltext.com
                                   Photoshop (just a tiny bit)


Processes used in outworld tools - 
I used cooltext.com to create the 3D text for the card.  Cooltext is great, because the images it creates already have a transparent background.  I found the gift card image using image search on google.  Using Paint.net, I created a different layer for each item, then imported the text, and the inworld SL picture of me into different layers.  I didn't get tooo fancy, Paint.net really does make using layers super easy.


Comments & Additional info
I only used Photoshop to help me remove the greenscreen for my inworld shot.  I need to learn to do this in Paint.net, but I already knew how to do it in PS, so I quickly did it there.  Everything else was done in Paint.net.  One thing about Paint.net, is that it cannot open multiple images at once, so I had to load up the text images for example, cut them out, then load up my project, and paste them in a layer.  This was pretty easy to do, especially for a free program.

"A Picture is worth a thousand words"


Title of picture - "A Picture is Worth a Thousand Words"


Photographer's Name - Strawberry Singh
                                        strawberrysingh@gmail.com


Models Name - Strawberry Singh


Location used - My Home


Windlight settings used - Default Midday with Scene Gamma increased to 2.09


Second Life Graphics Settings - Ultra


Inworld photo tools used - None


Details of inworld tools - NA


Outworld tools used - Photoshop


Processes used in outworld tools - Liquify, blur, burn, dodge, sharpen - I really didn't do much to this picture.


Comments & Additional info
The most important part of my pictures comes from the quality of the raw shot.  I always take my pics on ultra graphics and try to find the most suitable windlight preset for the skin, clothes and background I am shooting.  For up close face shots I usually use the midday with increased gamma and then play around with brightness and contrast in photoshop to get the best result.  I also usually reduce saturation often, although I did not do that here.  Liquify is also usually the first and most important thing I do.  Liquifying really makes a huge difference.  For a great liquify tutorial see this video:
http://www.youtube.com/watch?v=WkYEZD1sbn8


The burn tool was used to create the shadows under the legs.

Friday, December 18, 2009

Winter Cabin


Title of picture - Winter Cabin

Photographer's Name - Rylan Carling

Models Name - NA

Location used - somewhere in sl

Windlight settings used - Funky, Funky, Funky

Second Life Graphics Settings - High setting, All shaders on

Inworld photo tools used - none

Details of inworld tools - NA

outworld tools used - Photoshop

Processes used in outworld tools - 
Curves
Glaussian Blur (masked)
Dodge/Burn


Comments & Additional info

Friday, December 11, 2009

Who Says


Flickr Link - http://www.flickr.com/photos/felicityblumenthal/4151243959

Title of picture - Who Says

Photographer's Name - Felicity Blumenthal

Models Name - Felicity Blumenthal

Pose used  - Olive Juice - The ASS in Class

Location used - My Private home in SL

Windlight settings used - NONE!  Srsly.  My WL doesn't work

Second Life Graphics Settings - Lowest of the Lowest settings

Inworld photo toolsd  used - Serenade Photo Studio Pro V2.0

Details of inworld tools - White background on the Studio, as well as ALL lights on.

Outworld tools used - I'ma Photoshop girl

Processes used in outworld tools - 
Alrighty, lets see if I can splain...   So, I removed the white background from the image first, then I use the blur tool to smooth any rough edges and any left over pixelating I can see.

Then I adjust the brightness and contrast, generally about a -10 on brightness and +10 on contrast.  Followed by adjusting the shadow/highlight, this is usually a 10% or so on the shadows and 1 or 2% on highlighting.

  
After that I duplicate the layer, and give the lower layer a gaussian blur, and then make the upper layer semi transparent (usually some where around 40%).  I merge both these layers, so there is only one (in addition to the background)
.
To create the shadow I duplicated the layer again, and then selected the lower layer and filled it with black, gave it a gaussian blur, and again, made it semi transparent.  For the background glow, I used a spotlight lighting effect.  Then I added a line, and created a drop shadow to give it the look that the avie is leaning against the floor.


Finally, I used the marquee tool to select the lower portion of the hair, and skewed it to the right, to give it the effect that her hair is laying on the floor.


Comments & Additional info
I always minimize my image to 50% for the final, the max resolution I can manage out of my laptop is about 2000 x 1200, so resizing the image to 50% really cuts down on the pixelated edges and such

Tuesday, December 8, 2009

Waiting for Santa


Title of picture - Waiting for Santa

Photographer's Name - barbie winslett, barbie_carebear@yahoo.com.ar

Models Name - barbie winslett

Location used - My home at bdsm school (http://slurl.com/secondlife/Hymule/128/242/69 SLURL)

Windlight settings used - Default

Second Life Graphics Settings - Ultra - Midday

Inworld photo tools used - None

Details of inworld tools - NA

outworld tools used - Photoshop

Processes used in outworld tools -
Here is the recipe:
3 layers: main figure, window and glass

MAIN FIGURE:

pelicula granulada 1, intensidad 0
Pastels: trace lenght 26 trace detail 1 scale 50% relieve 2
Difuse glow: granulado 0 glow amount 7 lightness amount 15

WINDOW
any window, just cutted the glasses inside and i letted empty and i applied plastified

GLASS
a square and you apply fusion opacity 26%

AGAIN SELECT LAYER FIGURE
cristal: distorsion 2 smooth 6 scale 115%

FILTER PARTICLES
(snow) density 801 size 11 variance 39 body 2 opacity 45


Comments & Additional info -


is easy to make, if you have questions, ask me.

barbie xoxo

Monday, December 7, 2009

No Title - Yet


Flickr Link - No Title - Yet


Title of picture - No Title - Yet

Photographer's Name - Kitina Celt

Models Name - Kitina Celt

Location used  - My home in SL

Windlight settings used - * Starley * Setting 2

Second Life Graphics Settings - Medium

Inworld photo tools used -  None

Details of inworld tools - NA

outworld tools used - Corel Paint Shop Pro Photo X2

Processes used in outworld tools -
my process is 2 layer pics, the first one start off with smoothing the edges some, using a smudge smear tool to move around some and then creating a 2nd layer duplicate on top of it - then I sheer that layer some and on the bottom layer add Gausian Blur to the then messing with a fliter on the pic called Time machine which has several settings in it.  I also used different lighting effects on the layers to create it.

Comments & Additional info 
Basically I just take pictures I get a idea about all sudden and then it inspries me to get in my creative mode.

In The Grass


Flickr Link - In The Grass


Title of picture - In The Grass 


Photographer's Name - Kitina Celt


Models Name - Kitina Celt


Location used  - My home in SL

Windlight settings used - * Starley * Setting 2

Second Life Graphics Settings - Medium

Inworld photo tools used -  None

Details of inworld tools - NA

outworld tools used - Corel Paint Shop Pro Photo X2

Processes used in outworld tools -
my process is 2 layer pics, the first one start off with smoothing the edges some, using a smudge smear tool to move around some and then creating a 2nd layer duplicate on top of it - then I sheer that layer some and on the bottom layer add Gausian Blur to the then messing with a fliter on the pic called Time machine which has several settings in it.  I also used different lighting effects on the layers to create it.

Comments & Additional info 
Basically I just take pictures I get a idea about all sudden and then it inspries me to get in my creative mode.

Mochi Pile Up


Title of picture - Mochi Pile Up
Flickr Entry

Photographer's Name - Morgana Hilra

Models Name -  Mochi Milena

Location used - Posed for inworld

Windlight settings used - Default

Second Life Graphics Settings - High

Inworld photo tools used - Photolife Studio

Details of inworld tools - Photolife used for pose and generic background

outworld tools used - Photoshop, and lots of it

Processes used in outworld tools:


Filters used - Render, lighting, high shine, mid plastic/metal

Many layers..

Cloud rendering, layer setting lighten.

One duplicate layer, set to noir, and eraser to bring mild color thru.


Comments & Additional info

My Son & I


Title - My Son & I

Photographer's Name - Morgana Hilra

Models Names - Morgana Hilra & Zipben Aeon

Location used - My SL Home

Windlight settings used - "Mid Day"

Second Life Graphics Settings  - High

Inworld photo tools used - Photolife Photo Studio

Details of inworld tools - Posed for using Photolife

outworld tools used - PhotoShop & Mystical Lighting

Processes used in outworld tools -
Family RL vacationing photos used for background, photos were taken panoramic style.. best for that 3d effect.

Also, in Photoshop, made several layers, and used the render, lighting effects, as well as blur, lens blur set at 22, then layer option lighten.

Lol, done over and over again, til you get the style that you prefer.

(need to stress, render lighting effects MUST be high shiney, and metal for a glossy effect).


Comments & Additional info

Zip has been my son, for over two years now.. he adopted me, and I stuck by him.


Friday, December 4, 2009

Windlight Preset - Ana Lutetia's Studio


Title of picture - Day 24.  No, really. LOL  I don't title things, but
I took it for the 365 day blog project.


Photographer & Model: Alicia Chenaux

Location used: Above my house on Bluebonnet

Windlight settings used: I started with Ana Lutetia's Studio preset
[from the Emerald viewer presets] and then adjusted just slightly.)

Second Life Graphics Settings: High

Inworld photo tools used (photostudio, filtercam, etc): I'm using the
Sci-Fi Hallway from Glitterati and the Tryptic filter from FilterCam


outworld tools used (Photoshop, Paint.net, etc): Photoshop CS2 & PhotoScape

Processes used in outworld tools (source of textures, brushes, other
items used, etc):
In Photoshop I used liquify to smooth out any jagged
edges and used the clone stamp to remove hair that was sticking out
through my arm.  I also used a tutorial by Ryker Beck
(http://www.youtube.com/watch?v=tZlFhly-7Zc) to smooth out my face.  I
also used a very light brush to paint in a slight shadow, but I'm not
very good at that, so it's not much.  After that, I moved the photo to
PhotoScape and used the Cinema filter and a light vignette on the
sides, and finished it with a thin black frame.


Thank you Alicia for sharing!

Windlight Preset - *Starley* Settings 2


Title of picture - Morning Coffee

Photographer's Name - Aldwyn Zanzibar

Models Name - Aldwyn Zanzibar

Location - My Island Home, Again..:)

Windlight settings used


Second Life Graphics Settings


Inworld photo tools used - None

Details of inworld tools - NA

outworld tools used - None

Processes used in outworld tools - NA

Comments & Additional info

Just working through the Windlight Settings, one by one.

Thursday, December 3, 2009

Example Submission


Title of picture - First Picture!

Photographer's Name - Aldwyn Zanzibar

Models Name (if any) - none

Location used  - My Island Home

Windlight settings used - *Canimod - Noon

Second Life Graphics Settings  - Medium

Inworld photo tools used - None

Details of inworld tools - NA

outworld tools used - None

Processes used in outworld tools - NA

Comments & Additional info

This is an example of a post.  My goal is to have pics posted of all the windlight presets.  Please send in your favorites.

Any additional information can be added here also.  If you have a model, and want to talk abut the outfit, or something else significant about the picture, this is where you would put it.

Keep those pictures coming!

First Post!


Welcome to the Second Life Freeze Frame Blog!

I have been working on this idea for quite some time and it finally came together.

The goal of this blog is to have a place where Second Life residence can share their pictures, and the tools and techniques they use to create those pictures.

So please share what you have learned!  And hopefully someone will post something that will help you learn how to improve or give you new ideas for your photography!,


Here is the information that will be posted with each submission to this blog:

Title of picture -

Photographer's Name (inworld name required, email or additional methods of contact optional)

Models Name (if any)

Pose used (name of pose, and store/creator of the pose) -

Location used (general, but SLURL would be nice if possible)
Example:  Location - My Home or My sim at SURL or Sim Name (SLURL)

Windlight settings used (name of predefined settings, time of day, or details of custom windlight settings)

Second Life Graphics Settings ( Low, Med, High, ultra, custom etc) or send a screen shot of your graphics tab

Inworld photo tools used (photostudio, filtercam, etc)

Details of inworld tools (settings used, textures used, etc)

Outworld tools used (Photoshop, Paint.net, etc)

Processes used in outworld tools (source of textures, brushes, other items used, etc)

Comments & Additional info


Please email all submissions to aldwynzanz@gmail.com

Also, email with any quesitions, or IM me inworld!

I hope you enjoy this site!

Search This Blog

Legal Mumbo Jumbo

Second Life Freeze Frame blog is not responsible for unauthorized use of posted pictures. All pictures will be reviewed before posting to verify that proper information has been provided. Please notify Aldwyn Zanzibar either via email (aldwynzanz@gmail.com) or inworld if you feel a photo that has been posted is not authorized to be posted.